Piezoelectric String Devkit


(Same video on YouTube)

Paper: Ehrhardt, Neupert and Wegener (2020): Piezoelectric strings as a musical interface (562.7 KB) . In: Proceedings of the International Conference on New Interfaces for Musical Expression NIME. Birmingham: Royal Birmingham Conservatoire ( :trophy: awarded “Best Demo”)

BibTeX citation
@inproceedings{ehrhardt_piezoelectric_2020,
	address = {Royal Birmingham Conservatoire},
	title = {Piezoelectric strings as a musical interface},
	abstract = {Flexible strings with piezoelectric properties have been developed but until date not evaluated for the use as part of a musical instrument. This paper is assessing the properties of these new fibres, highlighting their strengths and weaknesses for nime applications.},
	booktitle = {Proceedings of {NIME} 2020},
	author = {Ehrhardt, Marcel and Neupert, Max and Wegener, Clemens},
	month = jul,
	year = {2020},
	pages = {2},}
}

A preview of the piezoelectric string preamp:


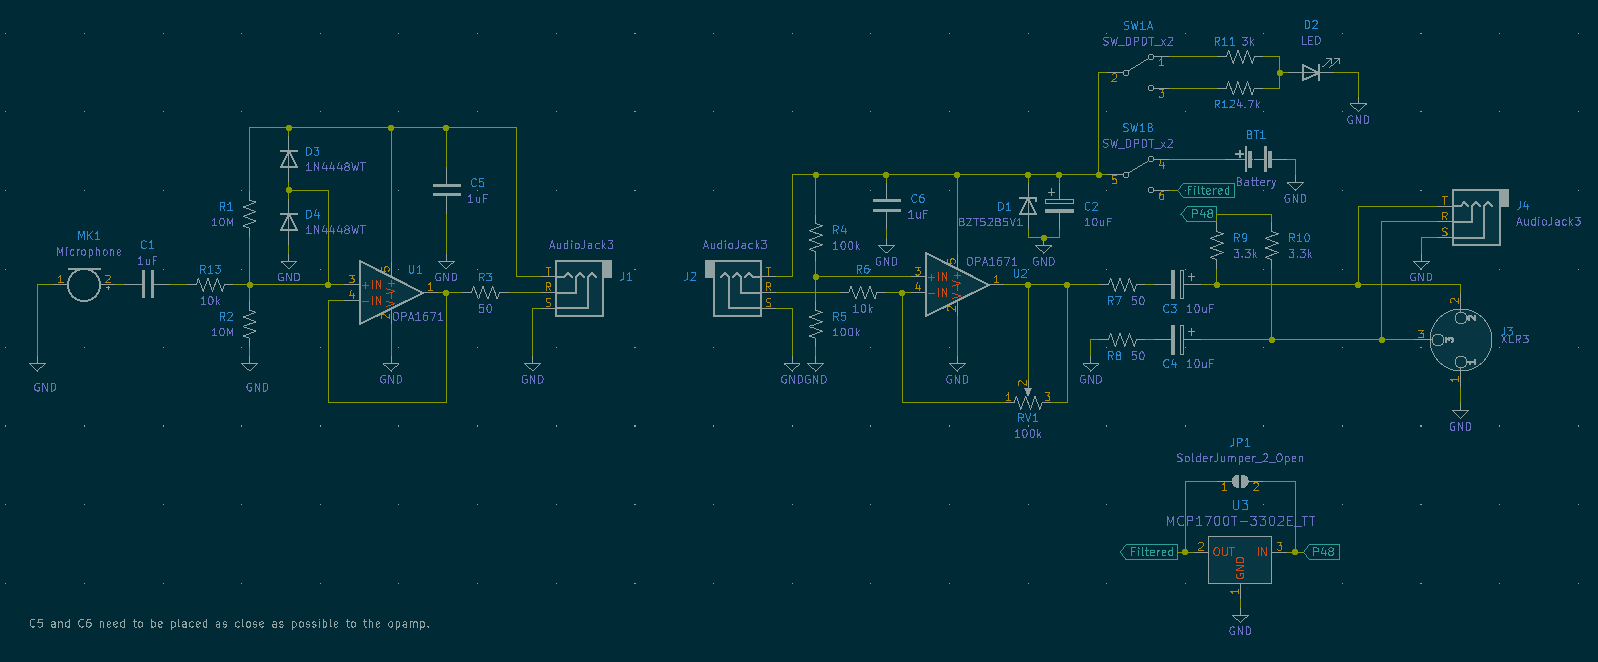
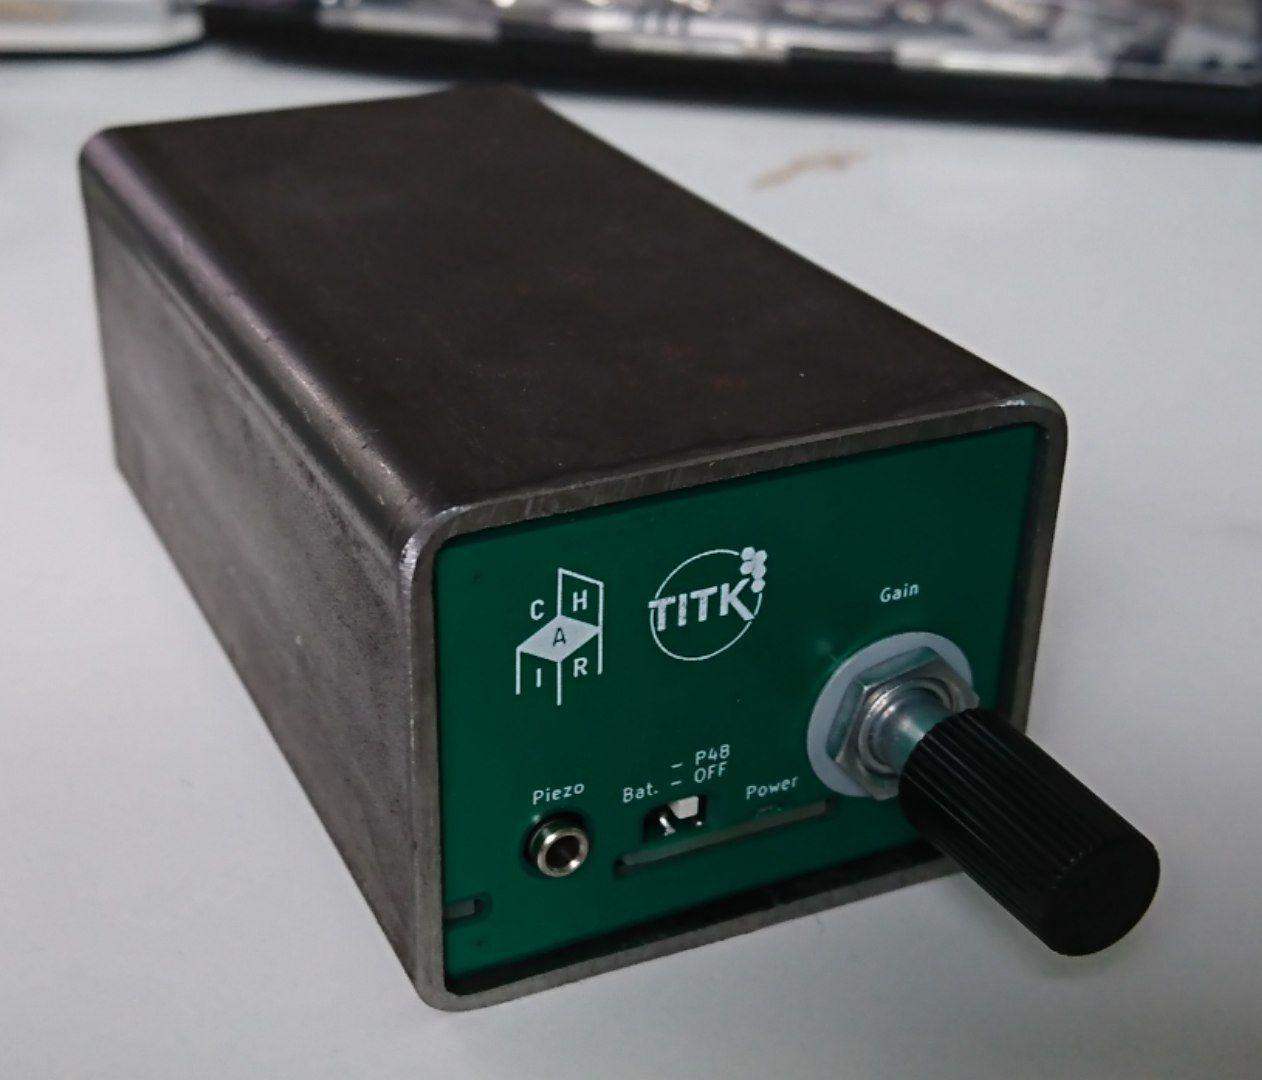
It can be powered either by two AAA batteries or via 48V phantom power (in the later case no batteries are necessary).
There is also an electrical simulation which you can see online at falstad.com

Bom_preamp-kit.csv (2.1 KB)

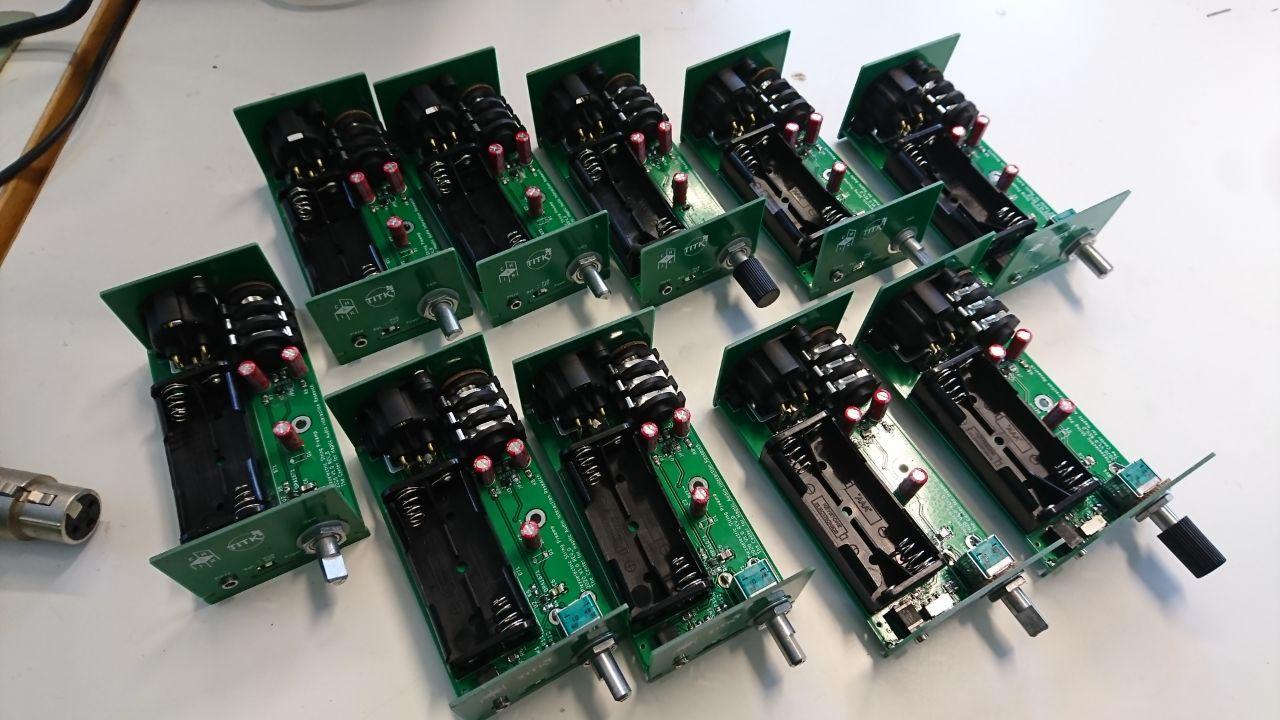
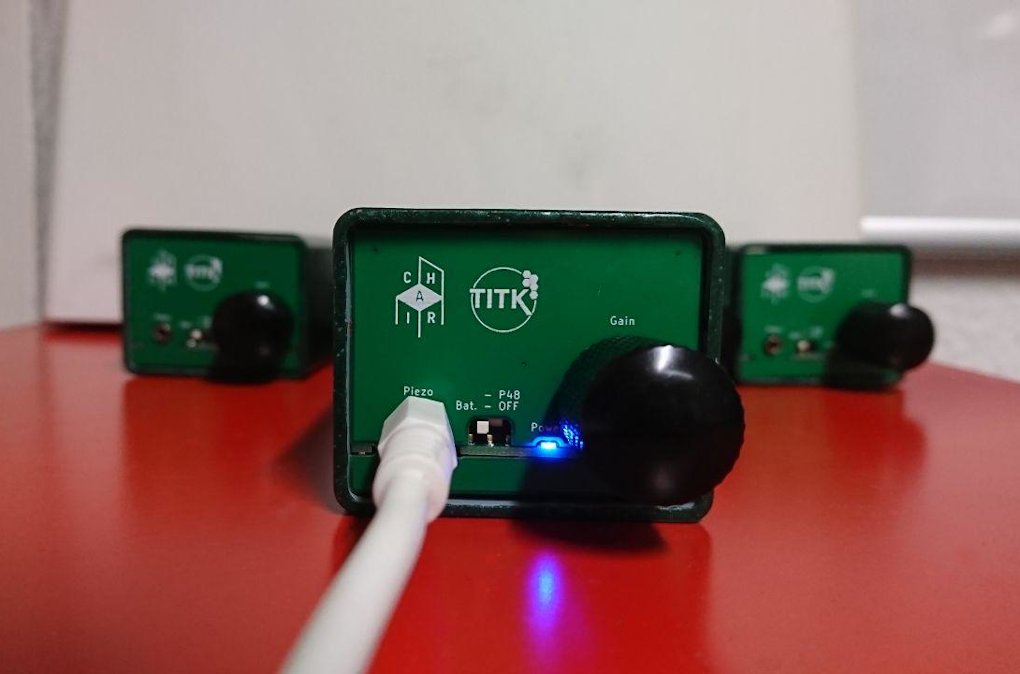
First batch are 10 kits.
If you want to be put on the list to reserve one, write me an email: max@ this domain.
We have 10 reservations now. Keep the reservations coming it will help us to determine the next batch size.

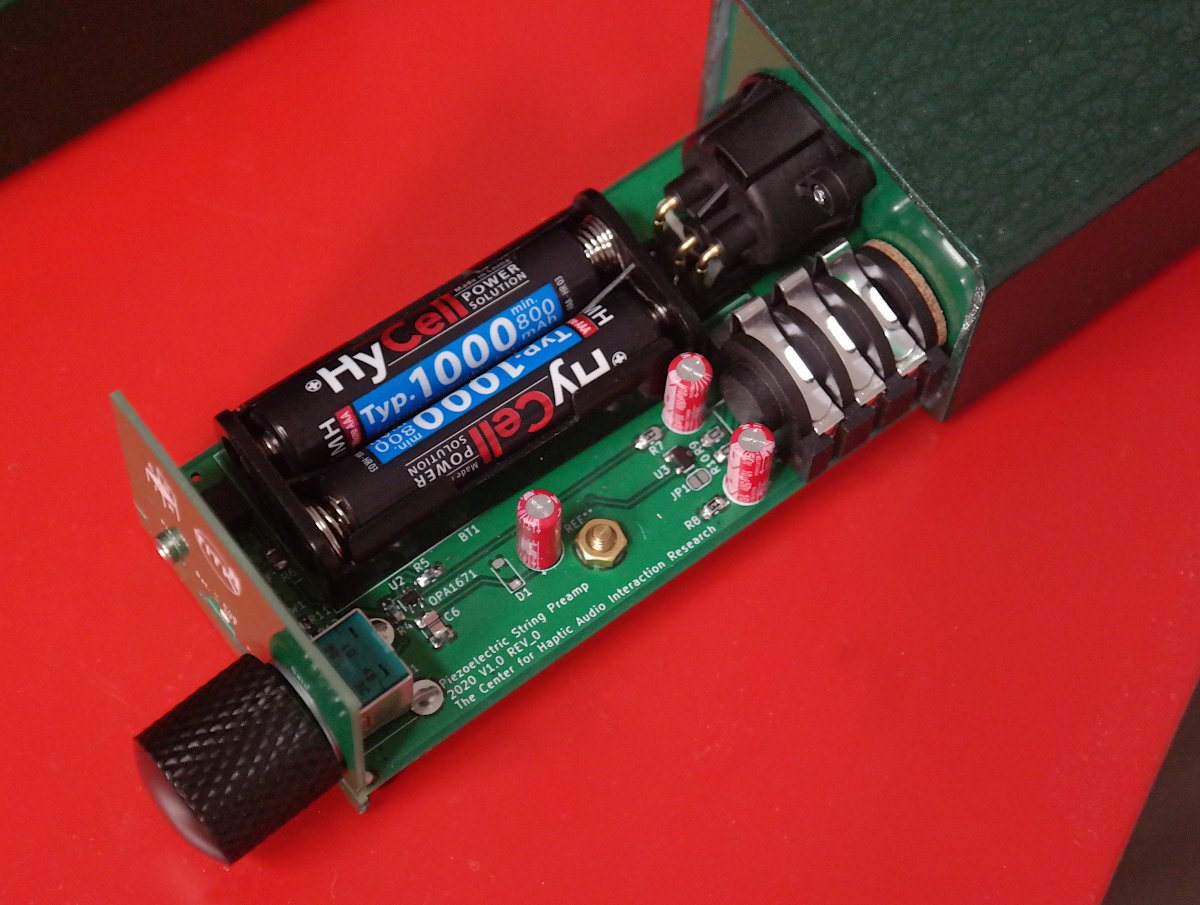
When researching how to power an amplifier from phantom power (P48) you’ll quickly discover the Schoeps circuit. Here are some links which we found when looking at schematics, but after some tests we finally decided not to use a Schoeps circuit at all. Our topology is instead based on a lightweight single channel op-amp which has an N-Channel JFET inside. We use the same opamp twice for two stages in our schematic. (I’m just parking these link here so I can close some tabs)

PCBs have arrived and the first one is assembled. Testing follows.

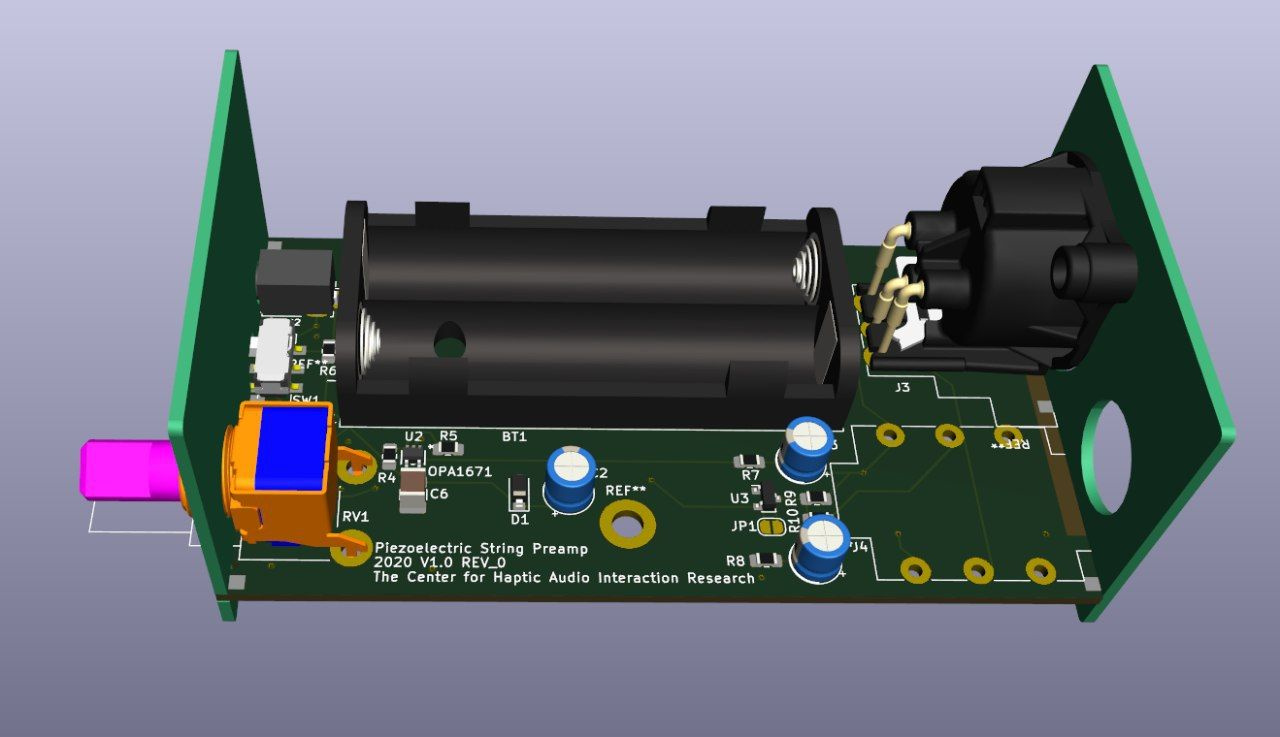
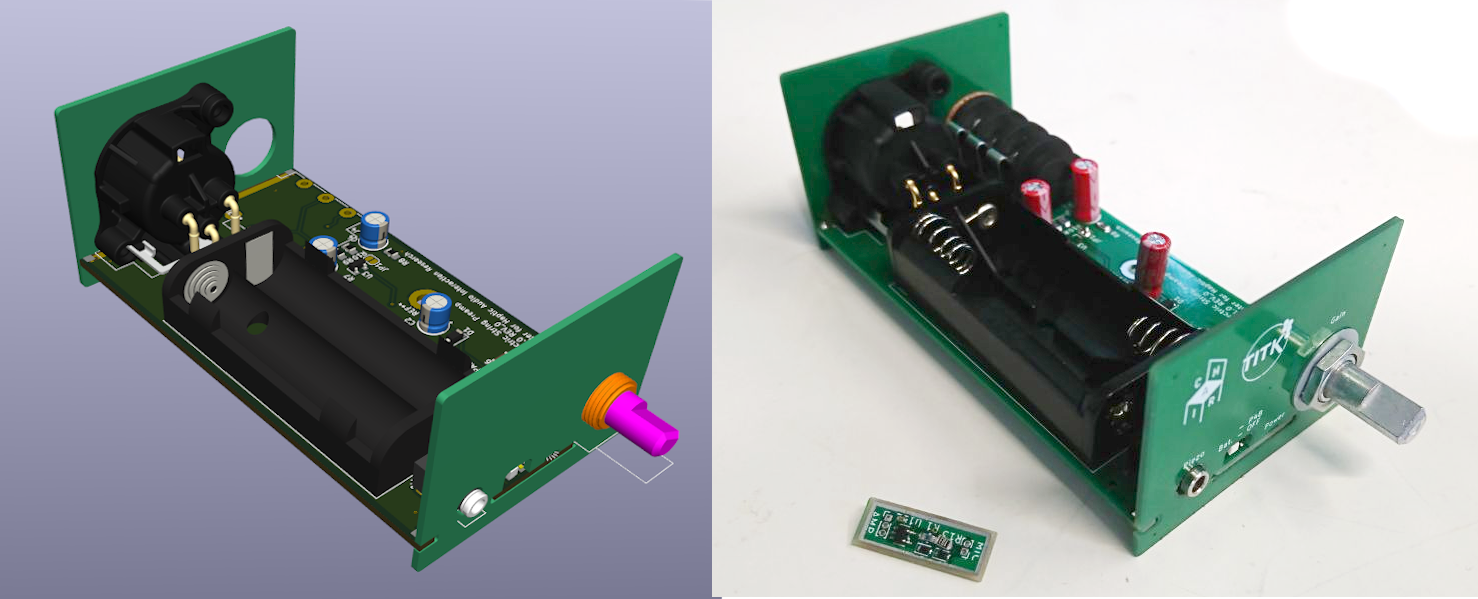
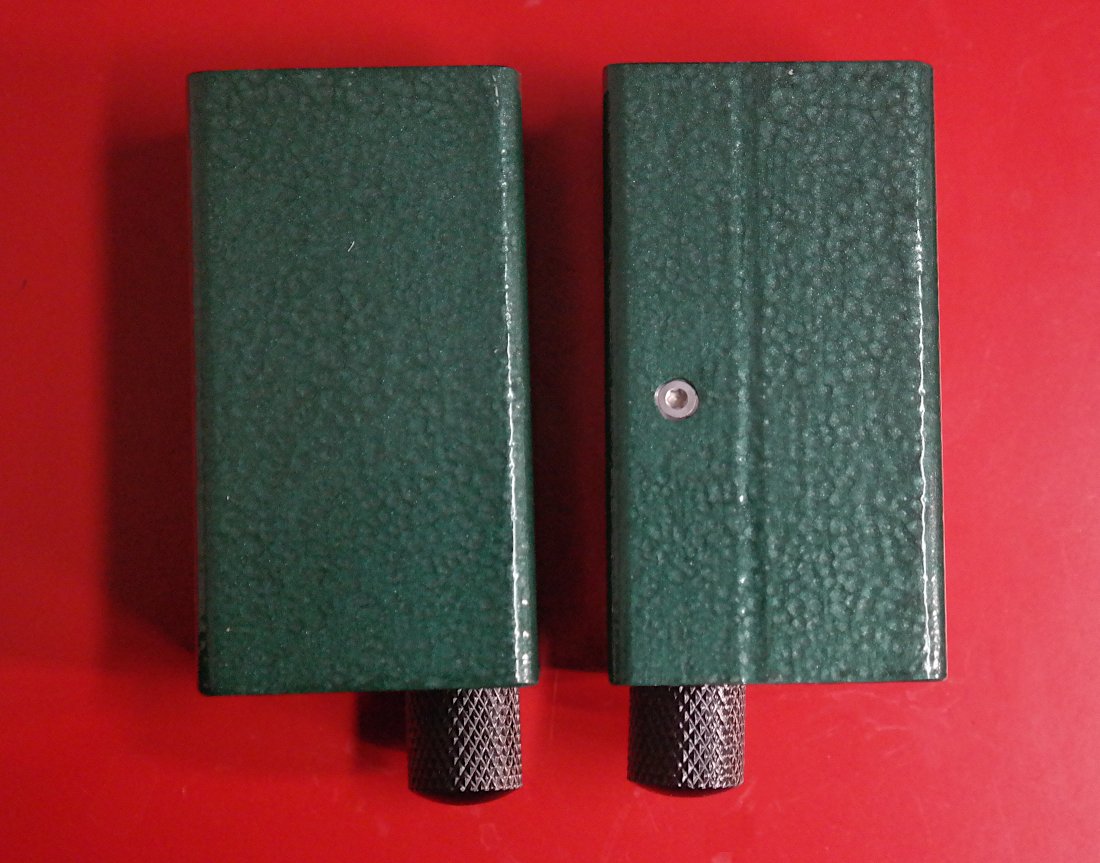
Test was successful. Now assembling the rest and making the casing (rectangular pipe segments).
We do however have to remake the first stage, which goes directly on the string itself due to mechanical reasons (Soldering holes for the cable were too small).
The PCB layout allows for two alternative assemblies: A) with Zener diode or B) with a linear regulator. Both works equally well, I can’t hear any difference. Probably because the power from P48 or batteries is super clean anyways. I’ve also compared ceramic capacitors with tantalum ones, and the ceramic caps don’t show any microphone characteristics even when I smack them with something.

Calculation with prices for one preamp with cost savings of an edition of 10 factored in:

Digikey

Designator(s) Item Sum
J2 CONN JACK STEREO 2.5MM R/A 0.57
BT1 BATTERY HOLDER AAA 2 CELL PC PIN 1.02
R1,R2 RES 220K OHM 1% 1/10W 0603 0.16
R4,R5 RES 10M OHM 1% 1/10W 0603 0.16
U1,U2 IC AUDIO 1 CIRCUIT SC70-5 (3x) 2.71
C6 CAP FILM 1UF 20% 16VDC 1210 0.53
C5 CAP FILM 1UF 20% 10VDC 1206 0.69
C1 CAP TANT 1UF 20% 16V 0603 0.28
U3 IC REG LINEAR 5V 89MA SOT23 0.38
R3 RES SMD 49.9 OHM 0.5% 1/16W 0402 (2x) 0.16
R6 RES SMD 10K OHM 0.5% 1/10W 0805 0.08
R9, R10, R11 RES SMD 3.32K OHM 1% 1/8W 0805 0.16
D2 LED BLUE CLEAR 2SMD R/A 0.44
SW1 SWITCH SLIDE DPDT 200MA 12V 1.06
R7, R8 RES SMD 49.9 OHM 1% 1/8W 0805 0.16
C2, C3, C4 CAP ALUM 10UF 20% 50V RADIAL 0.24
R12 RES SMD 4.7K OHM 5% 1/8W 0805 0.08
R15 RES SMD 10K OHM 0.5% 1/16W 0402 0.08
D3 DIODE ARRAY GP 85V 140MA SOT23-3 (2x) 0.28
SUM ___________________________________________ € 9.32

Voelkner (Conrad Electronic)

Designator(s) Item Price
RV1 ALPS RK09L1220 100KBX2 Pot Stereo 0.05W 100kΩ 1.72
J4 Rean (Neutrik) AV NYS215 6.35mm, Stereo 0.80
J3 Neutrik NC3MAAH XLR 0.78
SUM ___________________________________________ € 3.30

Shipping: see below.

Reichelt

Item Price
NFKE SG 25WG NF, 2,5 mm Stereo, 1,8 m, 3-pol (2x) 5.96
Knob 0.26
SUM ____________________________________________________ € 6.22

Shipping: see below.

JLCPCB

Item Price
PCB Production 2.08
PCB Production REV1 0.46
Import duties 2.49
SUM ____________________________________________________ €5.03

Shipping: see below.

Metal works

Item Price
Rectangular steel pipe 1.00
cutting, refining edges, drilling hole 10.60
SUM ____________________________________________________ €11.60

Hardware store

Item Price
Acetone (7.79) 0.78
Grey primer (8.99) 0.89
Green hammer paint (9.99) 0.99
Brush (1.89) 0.19
SUM ____________________________________________________ €2.85

Screws

Item Price
ISO 14581/ ~DIN 965 Senkschraube Torx A2 M 3x4 0.03
Screw LIKO ISR for Thermoplastic Torx 3x8 (2x) 0.22
SUM ____________________________________________________ €0.25

TITK

Item Price
2 x piezo fiber at small scale production cost 40.00
Sponsorship from TITK :+1: -10.00
SUM ____________________________________________________ €30.00

CHAIR

Item Price
Electrical engineering, breadboard prototyping, schematic* 300.00
4-panel PCB design* 200.00
*) ~ 1 week work time: A gift to you from CHAIR :slight_smile: -500.00
PCB assembly (SMT Hand soldering smallest part 0402) 75.00
Case paintjob 13.00
Case assembly 1.50
Testing QC 3.00
SUM ____________________________________________________ € 89.50

TOTAL per item costs: 155,09 (Sums from above)

Add shipping costs from all suppliers above: € 44 /10pcs = € 4.40
Protoyping costs (THT parts for breadboarding, excess ordered parts (minimum orders), items ordered for comparison tests, etc) € 84/10pcs = € 8.40

TOTAL per item costs costs: € 170.87
VAT (16% reduced rate): 27.34
With VAT: 198.21
Add Shipping

Steel works is done, now working on paint job.

It’s almost finished!
Here are some pictures of the final product:

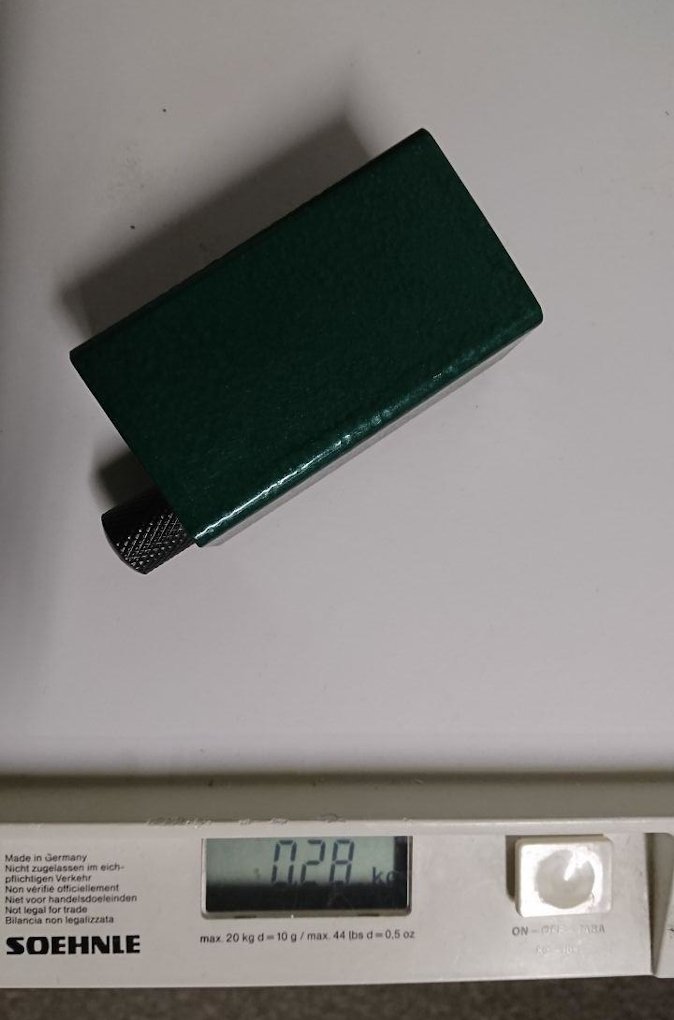
Back features TRS and XLR ports, TRS is meant for battery power and XLR for use with P48 phantom power. Please don’t connect both at the same time, you will be getting 48V on the jack if phantom power is on the XLR.

Batteries aren’t included as you might not need them when using phantom power.

Open this hexalobular internal 10 screw to slide out the PCB and change the two AAA batteries.

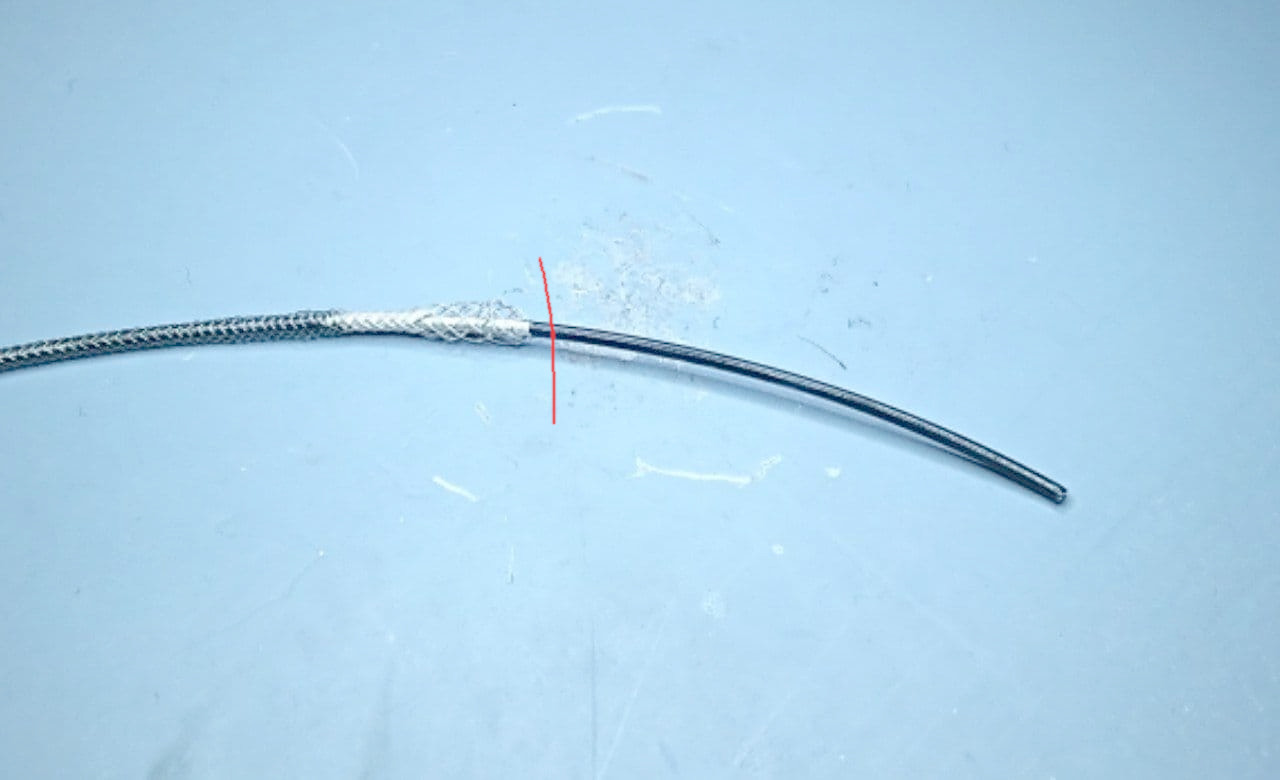
The fist preamp stage (impedance amplifier) sits directly on the fiber on this tiny PCB. Since the fiber is heat sensitive it is braided on the board, not soldered. It is then connected to the preamp box with a 2.5mm TRS jack cable. Each preamp kit comes with two of these fibers and cables. The fibers are about 1m long (the one pictured is shorter) and braided with a 50µm steel-filament. The fibers can be shortened to the desired length.

Power LED is on (Switch is in battery position)

Weight is a solid 280g, with batteries 300g.
I haven’t thought about packaging yet, but bubble-wrap will probably do.

This is the end of the fiber. The unshielded, exposed PVDF acts like a noise antenna. Feel free to just cut this part off where I put the red line. Don’t short it though, there can be no conductive contact between the inside rubber and the outside braided steel.

If you have the DevKit, you probably ask yourself how to to suspend the fiber without breaking it. Have you come up with solutions? I’m curious, please share your ideas. Something like this works OK for me:

I’ve made another quick demo:

Piezo fiber test with audio proessing by Richard Dudas.
Direct sound from piezo string on left channel, processed sound (echoes and transposition) on right channel.